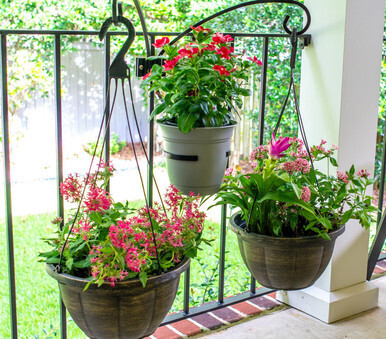
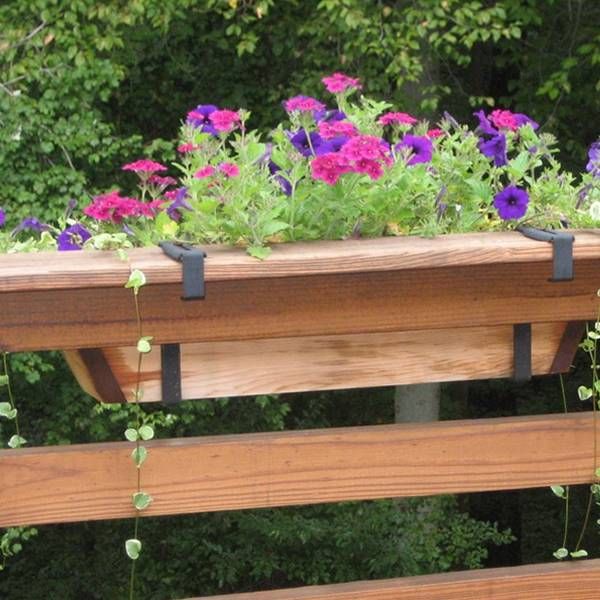
Railing brackets are an excellent solution for those who want to display plants on their balconies, decks, or fences. They allow you to hang pots or containers securely, adding greenery and visual interest to your outdoor spaces. Here's a detailed explanation of railing brackets and how they work:
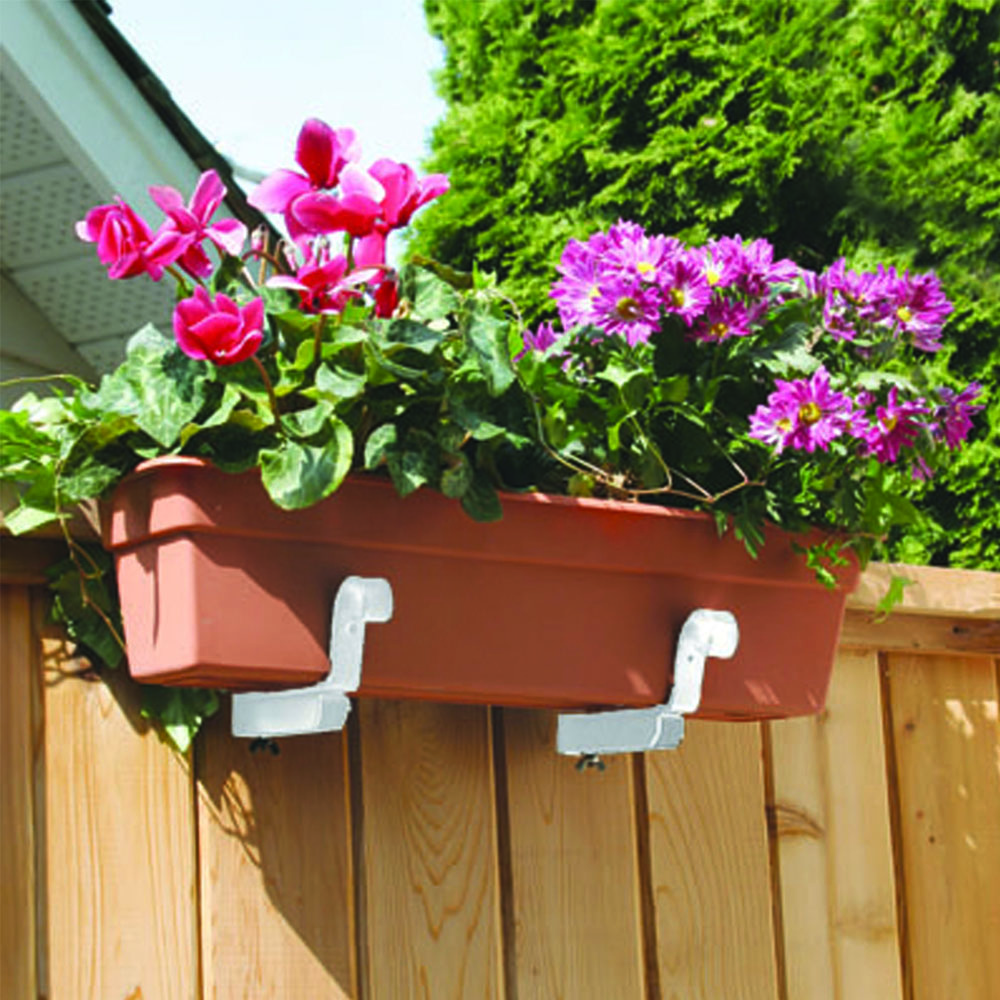
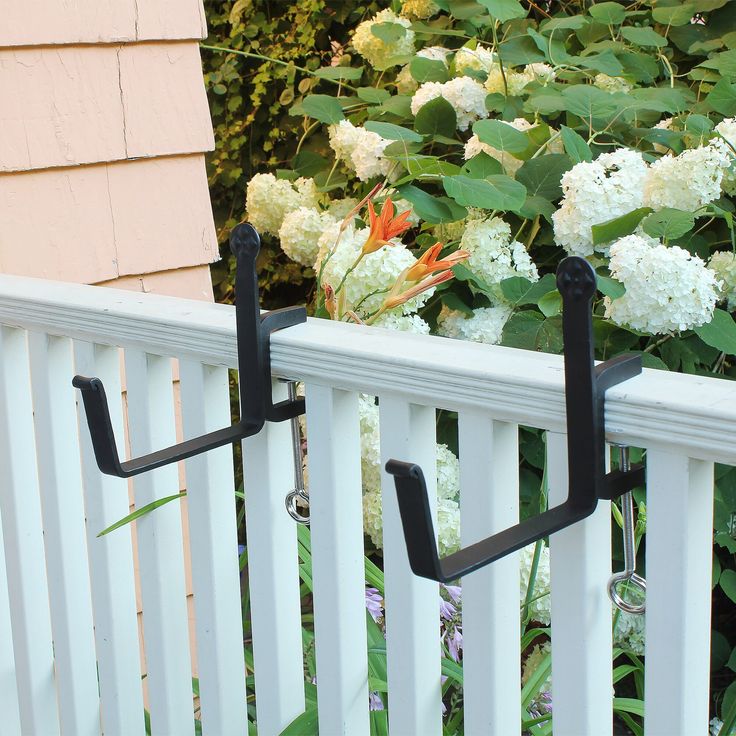
1. Railing Bracket Types: There are various types of railing brackets available, designed to fit different railing sizes and styles. Some common types include adjustable brackets, clamp-on brackets, and hook-style brackets. Adjustable brackets are versatile and can be adjusted to fit a wide range of railing sizes. They usually have a screw or locking mechanism that allows you to tighten the bracket securely onto the railing. Clamp-on brackets have a spring-loaded mechanism that clamps onto the railing, providing a firm grip. They are easy to install and remove. Hook-style brackets typically have a curved hook that hangs over the railing, supporting the weight of the pot or container. They are suitable for railings with a smaller diameter.There are various types of railing brackets available, designed to fit different railing sizes and styles. Some common types include adjustable brackets, clamp-on brackets, and hook-style brackets. Adjustable brackets are versatile and can be adjusted to fit a wide range of railing sizes. They usually have a screw or locking mechanism that allows you to tighten the bracket securely onto the railing. Clamp-on brackets have a spring-loaded mechanism that clamps onto the railing, providing a firm grip. They are easy to install and remove. Hook-style brackets typically have a curved hook that hangs over the railing, supporting the weight of the pot or container. They are suitable for railings with a smaller diameter.
2. Installation Process: Start by selecting the appropriate railing bracket for your railing type and size. Ensure that the bracket is sturdy and made of durable materials such as metal or heavy-duty plastic, as it will bear the weight of the pot and plant. Follow the manufacturer's instructions for installation. Depending on the bracket type, you may need to use screws, adjust the bracket size, or clamp it onto the railing. Place the bracket at the desired location on the railing, ensuring it is level and securely attached. Double-check the stability of the bracket by gently pulling on it before hanging the pot or container.
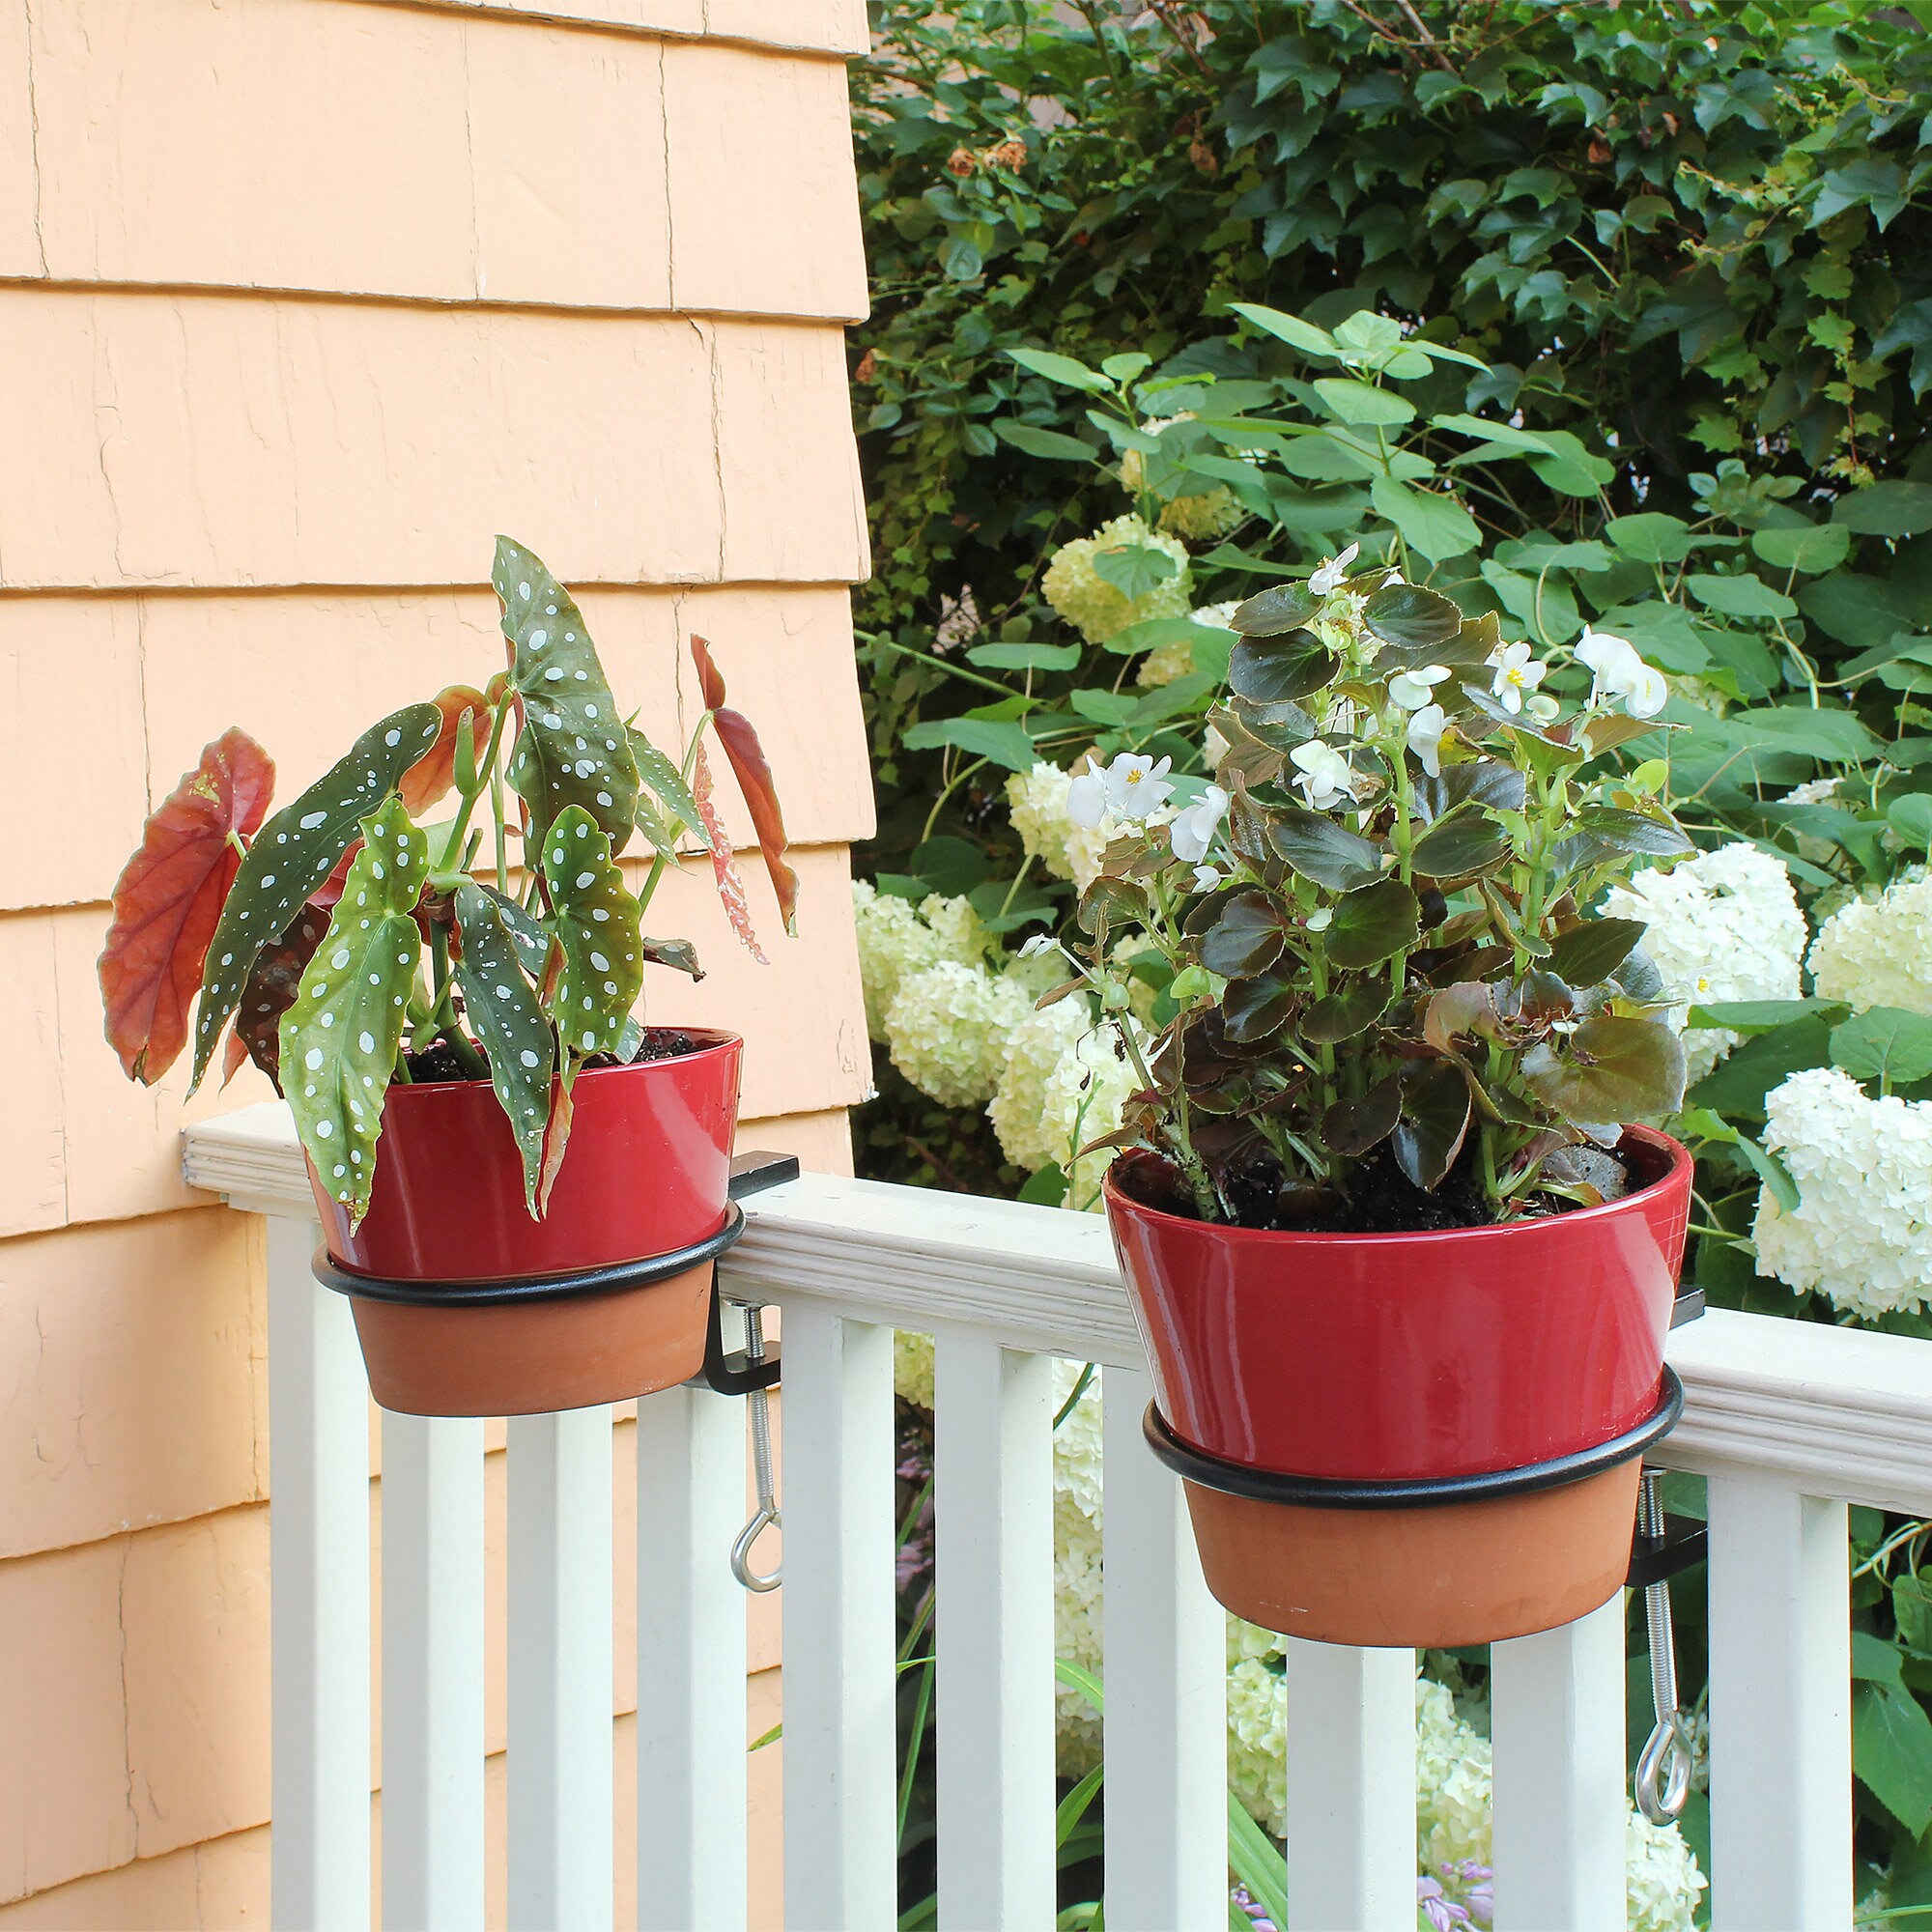
3. Pot Selection: Choose pots or containers that are suitable for railing brackets. They should have drainage holes to prevent waterlogging and root rot. Consider the weight of the pot and plant when selecting a size. Opt for lightweight materials such as plastic or resin for larger pots to reduce the overall weight. Ensure that the pot or container is compatible with the size and design of the railing bracket. It should fit securely without wobbling or tipping over.Choose pots or containers that are suitable for railing brackets. They should have drainage holes to prevent waterlogging and root rot. Consider the weight of the pot and plant when selecting a size. Opt for lightweight materials such as plastic or resin for larger pots to reduce the overall weight. Ensure that the pot or container is compatible with the size and design of the railing bracket. It should fit securely without wobbling or tipping over.Choose pots or containers that are suitable for railing brackets. They should have drainage holes to prevent waterlogging and root rot. Consider the weight of the pot and plant when selecting a size. Opt for lightweight materials such as plastic or resin for larger pots to reduce the overall weight. Ensure that the pot or container is compatible with the size and design of the railing bracket. It should fit securely without wobbling or tipping over.
Planting and Maintenance: Fill the pot or container with a well-draining potting mix, leaving enough space for the plant's root ball. Gently remove the plant from its nursery container, taking care not to damage the roots. If the roots are tightly bound, tease them apart slightly to encourage outward growth. Place the plant in the pot, adjusting the potting mix if necessary to ensure it is at the desired height. Firmly press the potting mix around the root ball, providing stability but avoiding compaction. Water the plant thoroughly after planting, allowing excess water to drain away. Ensure that the soil is evenly moist but not waterlogged. Hang the pot or container on the railing bracket, making sure it is secure and balanced. Regularly check the moisture level of the potting mix and water as needed. Adjust the watering frequency depending on the weather conditions and plant's water requirements. Fertilize the plant according to its specific needs, using a balanced water-soluble fertilizer during the growing season. Prune the plant as necessary to maintain its shape and promote healthy growth. Remove any dead or wilted foliage to keep the plant looking tidy.Fill the pot or container with a well-draining potting mix, leaving enough space for the plant's root ball. Gently remove the plant from its nursery container, taking care not to damage the roots. If the roots are tightly bound, tease them apart slightly to encourage outward growth. Place the plant in the pot, adjusting the potting mix if necessary to ensure it is at the desired height. Firmly press the potting mix around the root ball, providing stability but avoiding compaction. Water the plant thoroughly after planting, allowing excess water to drain away. Ensure that the soil is evenly moist but not waterlogged. Hang the pot or container on the railing bracket, making sure it is secure and balanced. Regularly check the moisture level of the potting mix and water as needed. Adjust the watering frequency depending on the weather conditions and plant's water requirements. Fertilize the plant according to its specific needs, using a balanced water-soluble fertilizer during the growing season. Prune the plant as necessary to maintain its shape and promote healthy growth. Remove any dead or wilted foliage to keep the plant looking tidy.
Water the plant thoroughly after planting, allowing excess water to drain away. Ensure that the soil is evenly moist but not waterlogged. Hang the pot or container on the railing bracket, making sure it is secure and balanced. Regularly check the moisture level of the potting mix and water as needed. Adjust the watering frequency depending on the weather conditions and plant's water requirements. Fertilize the plant according to its specific needs, using a balanced water-soluble fertilizer during the growing season. Prune the plant as necessary to maintain its shape and promote healthy growth. Remove any dead or wilted foliage to keep the plant looking tidy.
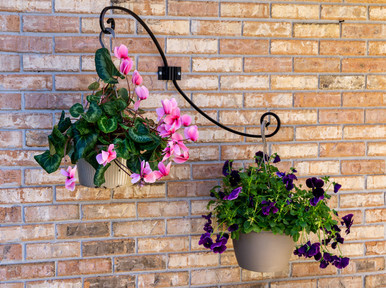
Considerations and Tips:Choose plants that are suitable for the light conditions in your outdoor space. Some plants prefer full sun, while others thrive in partial shade. Pay attention to the weight limitations specified by the manufacturer for the railing brackets. Avoid overloading them to ensure the safety and stability of the pots or containers. Regularly inspect the railing brackets and pots for any signs of wear, damage, or corrosion. Replace any damaged parts promptly to maintain their functionality and safety. Consider rotating the pots occasionally to ensure even growth and prevent plants from leaning towards one direction. If strong winds or severe weather conditions are expected, you may want to temporarily remove the pots from the railing brackets to prevent damage.Choose plants that are suitable for the light conditions in your outdoor space. Some plants prefer full sun, while others thrive in partial shade. Pay attention to the weight limitations specified by the manufacturer for the railing brackets. Avoid overloading them to ensure the safety and stability of the pots or containers. Regularly inspect the railing brackets and pots for any signs of wear, damage, or corrosion. Replace any damaged parts promptly to maintain their functionality and safety. Consider rotating the pots occasionally to ensure even growth and prevent plants from leaning towards one direction. If strong winds or severe weather conditions are expected, you may want to temporarily remove the pots from the railing brackets to prevent damage.
By paying attention to these detailed guidelines, you can create a stunning display of pot hanger plants that will thrive and enhance the beauty of your space. Remember to adjust the care routine based on the specific needs of the plant species you choose, as each plant may have slightly different requirements. Happy gardening!
By paying attention to these detailed guidelines, you can create a stunning display of pot hanger plants that will thrive and enhance the beauty of your space. Remember to adjust the care routine based on the specific needs of the plant species you choose, as each plant may have slightly different requirements. Happy gardening!By paying attention to these detailed guidelines, you can create a stunning display of pot hanger plants that will thrive and enhance the beauty of your space. Remember to adjust the care routine based on the specific needs of the plant species you choose, as each plant may have slightly different requirements. Happy gardening!By paying attention to these detailed guidelines, you can create a stunning display of pot hanger plants that will thrive and enhance the beauty of your space. Remember to adjust the care routine based on the specific needs of the plant species you choose, as each plant may have slightly different requirements. Happy gardening!
Common pests that can affect pot hanger plants include aphids, mealybugs, spider mites, and scale insects. Regularly inspect the plants for signs of infestation, such as distorted leaves, sticky residue, or visible insects. Use organic insecticidal soaps or horticultural oils to control pests. Follow the instructions provided and ensure the product is safe for the specific plant species. Prevent the occurrence of fungal diseases by providing good air circulation around the plants. Avoid overwatering and ensure the plants have enough space between them to reduce humidity levels. If fungal diseases do occur, treat them with appropriate fungicides or natural remedies recommended for the specific disease.
Fill the container with the potting mix, leaving enough space for the plant's root ball. Gently remove the pot hanger plant from its nursery container, being careful not to damage the roots. If the roots are tightly bound, gently tease them apart to encourage outward growth. Place the plant in the prepared container, ensuring it is centered and at the desired height. Adjust the potting mix if necessary. Firmly press the potting mix around the root ball to provide stability but avoid compacting it too much. Water the plant thoroughly after planting, allowing excess water to drain away. Ensure the soil is evenly moist but not waterlogged. Hang the container in a suitable location based on the plant's light requirements. Most pot hanger plants prefer bright, indirect light, but some can tolerate lower light conditions. Regularly check the moisture level of the potting mix and water as needed. Avoid overwatering, as it can lead to root rot, and do not let the soil dry out completely. Fertilize the pot hanger plants during the growing season with a balanced, water-soluble fertilizer. Follow the manufacturer's instructions for application rates and frequency. Monitor the plant for any signs of pests or diseases. Inspect the leaves, stems, and undersides of the foliage regularly. If pests are present, take appropriate measures to control them using organic or chemical methods. Prune the pot hanger plants as needed to maintain their shape and encourage bushier growth. Trim back any leggy or overgrown stems to promote new growth and maintain an attractive appearance.Fill the container with the potting mix, leaving enough space for the plant's root ball. Gently remove the pot hanger plant from its nursery container, being careful not to damage the roots. If the roots are tightly bound, gently tease them apart to encourage outward growth. Place the plant in the prepared container, ensuring it is centered and at the desired height. Adjust the potting mix if necessary. Firmly press the potting mix around the root ball to provide stability but avoid compacting it too much. Water the plant thoroughly after planting, allowing excess water to drain away. Ensure the soil is evenly moist but not waterlogged. Hang the container in a suitable location based on the plant's light requirements. Most pot hanger plants prefer bright, indirect light, but some can tolerate lower light conditions. Regularly check the moisture level of the potting mix and water as needed. Avoid overwatering, as it can lead to root rot, and do not let the soil dry out completely. Fertilize the pot hanger plants during the growing season with a balanced, water-soluble fertilizer. Follow the manufacturer's instructions for application rates and frequency. Monitor the plant for any signs of pests or diseases. Inspect the leaves, stems, and undersides of the foliage regularly. If pests are present, take appropriate measures to control them using organic or chemical methods. Prune the pot hanger plants as needed to maintain their shape and encourage bushier growth. Trim back any leggy or overgrown stems to promote new growth and maintain an attractive appearance.
Choose plants that are suitable for the light conditions in your outdoor space. Some plants prefer full sun, while others thrive in partial shade. Pay attention to the weight limitations specified by the manufacturer for the railing brackets. Avoid overloading them to ensure the safety and stability of the pots or containers. Regularly inspect the railing brackets and pots for any signs of wear, damage, or corrosion. Replace any damaged parts promptly to maintain their functionality and safety. Consider rotating the pots occasionally to ensure even growth and prevent plants from leaning towards one direction. If strong winds or severe weather conditions are expected, you may want to temporarily remove the pots from the railing brackets to prevent damage. By following these detailed guidelines, you can safely and effectively use railing brackets to display your plants and create a charming and inviting outdoor space.